Django is a free and open-source collection of libraries written in Python, which follows the model-view-template-controller (MVTC) architectural pattern. It is one of the most popular server-side web frameworks with the motto being ‘Don’t Repeat Yourself’. It is maintained by the Django Software Foundation (DSF), an independent non-profit organization.
Django's primary goal is to ease the creation of complex, database-driven websites emphasizing reusability and "pluggability" of components, less code, low coupling, rapid development, and the principle of don't repeat yourself. One of the cool features of Django is, it provides an optional administrative dashboard for performing create, read, update and delete (CRUD) operations that are generated dynamically based on the admin models and the user-written models.
Some of the well-known websites using Django are Public Broadcasting Service, Instagram, Mozilla, The Washington Times, Disqus, Bitbucket and Nextdoor and many more.
History of Django
Django was created in the fall of 2003, when the web programmers at the Lawrence Journal-World newspaper, Adrian Holovaty and Simon Willison, began using Python to build applications. It was released publicly under a BSD license in July 2005. The framework was named after guitarist Django Reinhardt. In June 2008, it was announced that a newly formed Django Software Foundation (DSF) would maintain Django in the future.
Key Features of Django
- Modularity is the key selling point. Features of django are decoupled so that developers can pick and choose the module of interested right for the project
- A free rich API – Automatically generates Python API based on models
- Database creation automatic – Using the migrate and makemigrations command, django will generate the database tables required using the class models specified
- Admin dashboard – a quick and easy way to populate the data
- RSS / Atom Feed framework – quickly create the feeds from the python classes
- Powerful cache framework for dynamic websites
- Powerful built-in template system
- Easy database migrations
- Security features – protect against XSS, CSRF attacks, SQL injections
Design Pattern used in Django - Model-View-Template-Controller Architectural Pattern

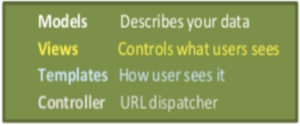
Model
The model is a model or the representation of your data. It’s not the actual data, but an interface to the data. The model allows you to pull data from your database without knowing the intricacies of the underlying database. The model usually also provides an abstraction layer with your database, so that you can use the same model with multiple databases.
Template
The presentation layer. The template is what you see. This layer contains presentation-related decisions: how something should be displayed on a Web page or other type of document.
View
The business logic layer. This layer contains the logic that accesses the model and defers to the appropriate template(s). You can think of it as the bridge between models and templates.
Controller
The URL Dispatcher maps the requested URL to a view function and calls it.
Installing Django
This is a simple 3 step process
- Ensure you have Python installed on your system, else visit here for python installation. https://www.python.org/downloads/
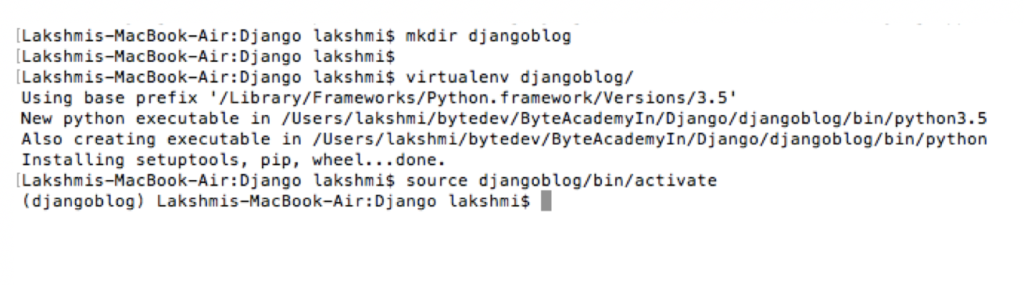
2) Install a Python Virtual Environment - It is always to good practice to work with Virtual Environment, a cool feature to work with individual projects. This ensures the different library versions cannot be in conflict when we choose different libraries for different projects.
- pip3 install virtualenv
- mkdir djangoblog
- virtualenv djangoblog
- cd djangoblog
- source djangoblog/bin/activate
3) Installing Django
pip3 install Django
The current version Django 2.1, will be installed in your virtual environment system.
Experiment with a Django Project:
Let us walk through how a Django framework can be used to build a simple full stack application. Here we are taking an example of building a blogger app using django.
A project is a collection of settings and some auto-generated files and folders for an instance of Django project. The auto-generated code contains
- a collection of settings for an instance of Django
- database configuration
- Django-specific options and application-specific settings.
Start project as follows:
django-admin startproject myblogger
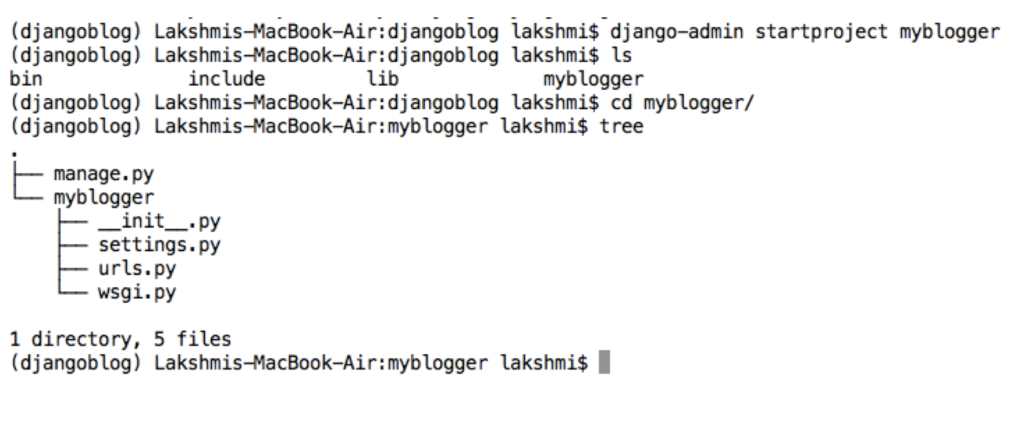
The project folder has been created in the folder, where I have run the startproject command
Now all the associated python files and folders will be created in the project folder. Now you are set to work on the Django project.
Folders and Files of the Django Project
- manage.py:
A command-line utility that lets you interact with this Django project in various ways. It can be called the entry point of your project. It does the same function as django-admin, but takes care of few things for you:
- It puts your project’s package on sys.path.
- It sets the DJANGO_SETTINGS_MODULE environment variable so that it points to your project’s settings.py file.
If you enter python3 manage.py in your command line, you will see the different functionalities that manage.py gives you.
Some of the subcommands that will be useful for our project are:
makemigrations - makemigration will create the migration. A migration basically tells your database how it's being changed(i.e new column added, new table, dropped tables etc.)
migrate - migrate is what pushes your changes to your database. It will run all the migrations created(or the ones that haven't been pushed yet).
runserver - Starts a lightweight development Web server on the local machine. By default, the server runs on port 8000 on the IP address 127.0.0.1. You can pass in an IP address and port number explicitly.
2. settings.py:
This file contains the database configuration setting, mail setting, language used, and all other configurations for your project. Once you have started your project, this file has to be edited first. You can change the database engine, you use, for the project and the database name. In this case, we are using sqlite3 database and database name is stories.db. The other settings details you might want to change will be timezone, language.
The INSTALLED_APPS, initially contains all the apps that have been installed in your project by Django. When you create an app, you will have to add the name of the app, here. MIDDLEWARE is a low-level plugin system, those plugins that will be essential for your project, like Google Authenticator, will be put up in Middleware. The important thing to be noted here is the order in which the plugins are kept. When you add a middleware, be careful to add it according to the sequence in which your application runs.
STATIC_URL contains the path, where your static files, such as javascript files, stylesheets and images are kept.
- urls.py:
This file contains the URL Configuration in your project. A URL configuration is like a table of contents for your Django-powered website. Basically, it’s a mapping between URLs and the view functions that should be called for those URLs.
- Wsgi.py:
Django’s primary deployment platform is WSGI, the Python standard for web servers and applications. Wsgi.py contains the default WSGI configuration for your project. which you can tweak as needed for your project, and direct any WSGI-compliant application server to use.
- __init__.py:
The __init__.py files are required to make Python treat the directories as containing packages; this is done to prevent directories with a common name, such as string, from unintentionally hiding valid modules that occur later on the module search path. In the simplest case, __init__.py can just be an empty file, but it can also execute initialization code for the package or set the __all__ variable, described later.
Running the project
python3 manage.py runserver
If your screen is like this after running the runsever subcommand with manage.py, then your Django installation and the initial setup has been completed and the django server is running at localhost.

Enter web browser URL (Eg: Mozilla Firefox), the server address given: http://127.0.0.1:8000/
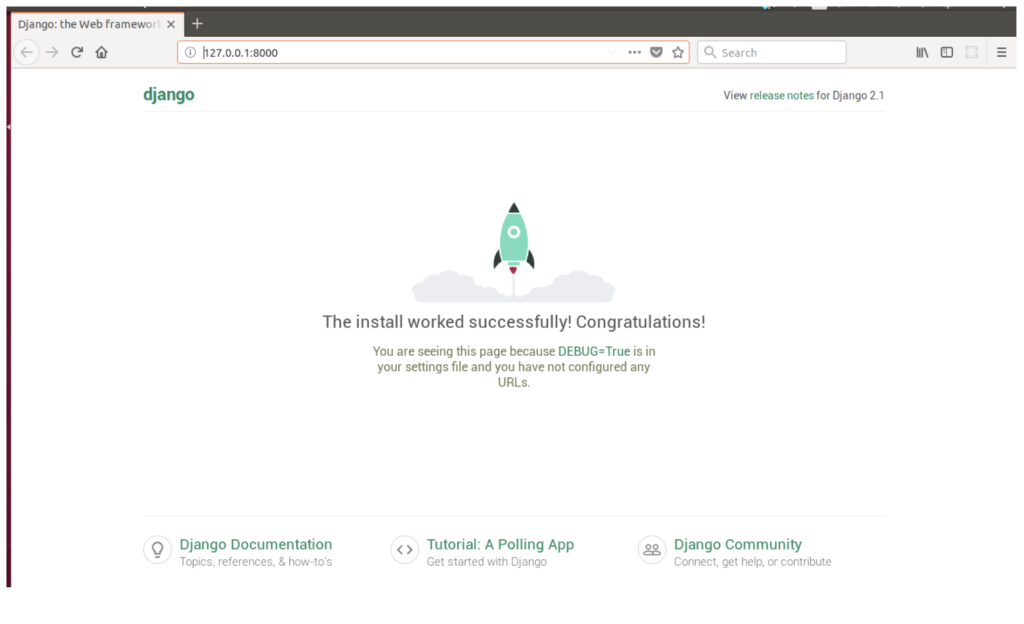
Now I see that you are happy in seeing, a little colour in your application. This is the web page, showing that your Django application has been installed successfully, and you can begin working on your project.
And about the red commands, that you saw in the terminal can be removed, by following the below steps:
- To shutdown the server, Press Ctrl+C in your terminal
- python3 manage.py makemigrations
Now you will see ‘No changes detected’. This message is shown, because you haven’t, created any models or apps in your project. All the database changes that are pending, are the ones created by Django.
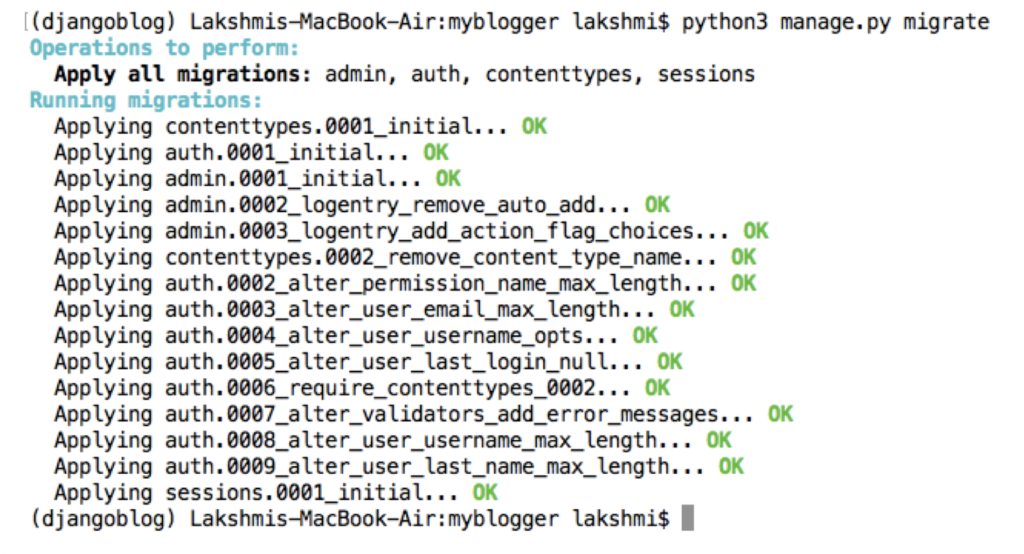
- python3 manage.py migrate
You will see some set of operations being performed, and some changes being applied with OK given in the end. Now the database changes that were initialized by Django is being applied to the database, that you have set. If you count the number of applied changes, it will be equal to the number of unapplied migrations, that Django notified you, when you run the server, just after installation.
python3 manage.py runserver
There will be no red alert errors, just the clean terminal saying that your project is running.
Liked what you read? Checkout Byte Academy's Software Development and Intro to Python courses.